People often ask us this: "I found a great-looking theme on the Internet, how do I import it into PHPRunner or ASPRunner.NET". The problem is that all themes are implemented differently, there is no standard they follow and they cannot be "imported". However, it is possible to make your project look exactly like any of those themes and this article will teach you how to do this.
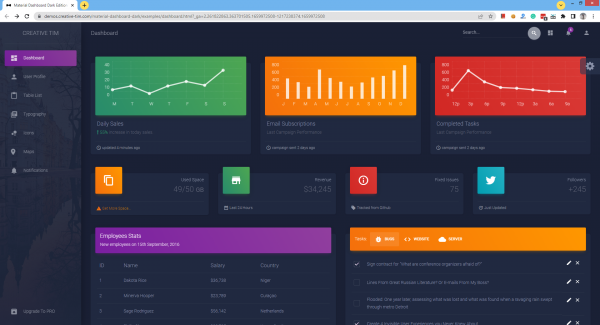
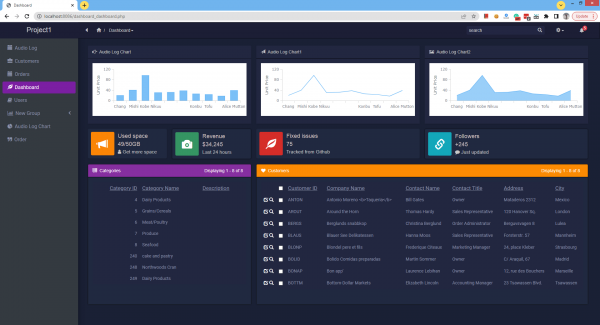
For the inspiration, we will be using Material Dashboard Dark Edition theme by Creative Tim. Here is how it looks:
1. Create a dashboard
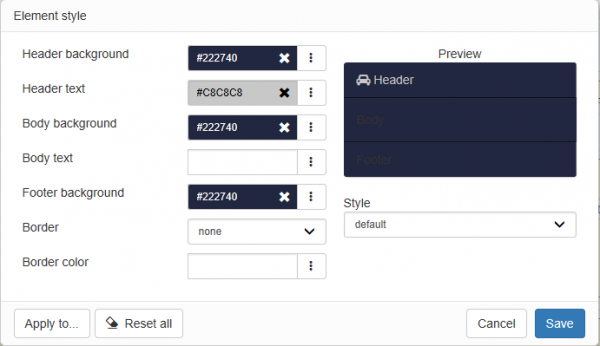
For starters, we simply create a dashboard with three rows and add dashboard elements there. The top row is for charts, the second one is for charts and the last one is for grids. Using "Colors" button we can customize the colors of all dashboard elements. Here are color settings for charts:
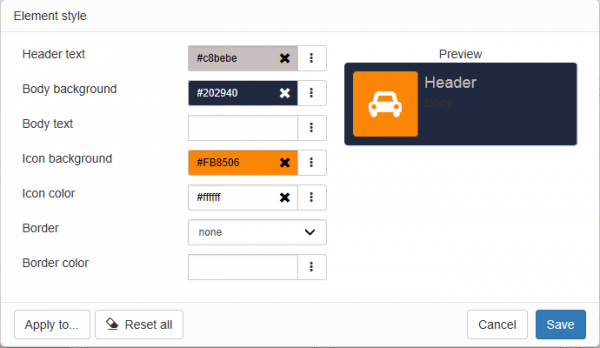
For code snippets choose snippet style 'Left icon'. Here are the snippet's color settings. The background color will be different for each snippet.
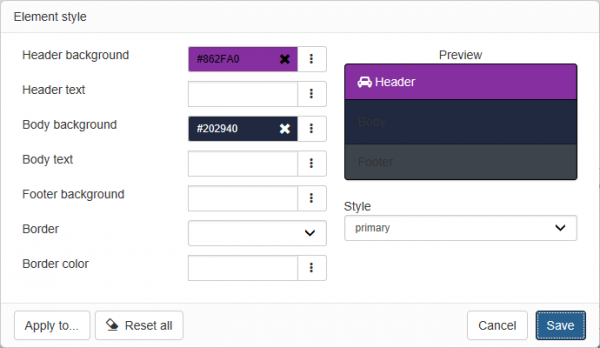
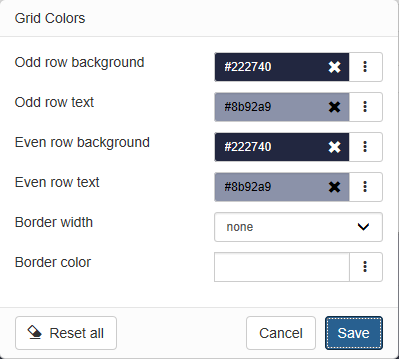
And here are color settings for grids. The header background will be different for different grids.
2. Code snippets
Here is the code that we use for the first code snippet.
$header = "Used space49/50GB"; echo "Get more space";
Note, that we have three different pieces of info in this snippet and we assign a separate CSS class like snip_title to each piece. We will customize it later via Custom CSS.
3. Fonts
Another useful feature of version 10.8 is extended support for fonts. The original theme uses the famous Roboto web font and we will do that too. In the Page Designer proceed to the List page of the first grid, select all grid fields and grid headers and set 'font family' to Roboto. Now select just the header elements and set font size to 17px. In a similar manner set the font size for regular grid fields.
Repeat the same for all grids that are part of your dashboard.
4. Topbar and sidebar settings
This needs to be done on the Style Editor screen. This is fairly straightforward.
Also, on the same screen, click 'Grid colors' button and specify grid colors.
So far so good. we have been only using the built-in PHPRunner/ASPRunner.NET functionality and it looks pretty good already.
You can see that the sidebar color doesn't match, chart colors need to be tweaked, and snippet fonts and positioning of elements need more work. Also, grids can use and bit more styling too.
5. Charts code
Chart customization is done via code added to the ChartModify event. We already have this code for you, so you can just copy and paste it into your event. The code is almost identical for all charts, just change the background color in the first line.
chart.background().fill("#339465");
var yTitle = chart.yAxis().title();
yTitle.enabled(false);
chart.xAxis().labels().fontColor("#BCDBD0");
chart.yAxis().labels().fontColor("#BCDBD0");

chart.xAxis().labels().format(function() {
  var value = this.value;
  // limit the number of symbols to display
  value = value.substr(0, 4);
  return value
});

var series = chart.getSeriesAt(0);
series.color("#FFFFFF");
6. Custom CSS
Here is the Custom CSS that does the rest of the job. Inline comments will help you navigate this code. The code needs to be added under Style Editor -> Modify CSS.
/* body background */

body {
background: #1a2035 !important;

}

/* left sidebar background */

.r-left:before {
    content: ' ';
    background-image: url(../../images/sidebar-2.jpg);
    background-position: 50%;
    position: absolute;
    top: 0;
    left: 0;
    height:  98%;
    width:  100%;
}

#mCSB_1 {

    opacity: 0.95;
height: 100%;
    background: #1f283e;
}

/*  grids
    make sure to replace grid IDs here with your own*/

#dashelement_categories_grid1 .panel-heading,
#dashelement_customers_grid1 .panel-heading {
    padding: 17px;
}

#dashelement_categories_grid1 td,
#dashelement_customers_grid1 td {
    border-top-width: 1px;
    border-color: hsla(0,0%,71%,.1);
    padding: 9px;
}

/* code snippets */

.snip_title {
color: #8b92a9;
    text-align: right;
    font-family: 'Roboto';
    font-size: 14px;
}

.snip_body {
color: #606477;
    text-align: right;
    font-family: 'Roboto';
    font-size: 25px;
}

.snip_link {
color: #a9afbbd1;;
    text-align: right;
    font-family: 'Roboto';
    font-size: 12px;
    padding-top: 20px;
}
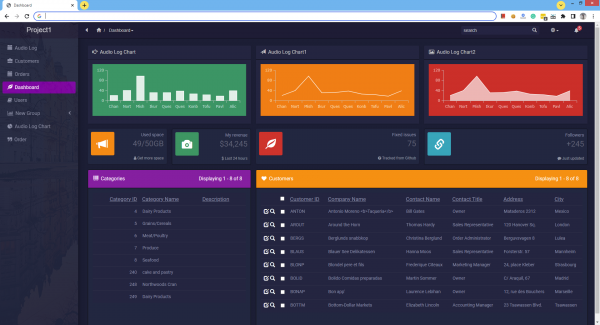
This is pretty much it. Here is the final result, the way how it looks in PHPRunner or ASPRunner.NET.
7. Sample projects
Requirements:
- MySQL database
- Version 10.8 of PHPRunner or ASPRunner.NET
Some people will find it easier just to download and run the sample projects that already have everything in there configured. Download a sample project, unzip it to a brand new folder, and execute SQL script ( MySQL only ) to create the required tables and data. Open the project in PHPRunner 10.8 or ASPRunner.NET 10.8, build and run.
Project for PHPRunner
Project for ASPRunner.NET
Enjoy!
